Flutter Tutorials – #1.7 – PageView & BottomNavigationBar
Introduction
Welcome to Himdeve development, where we are preparing the best tutorials to make your mobile app development easier and more efficient.
Goal
- In the Portfolio screen, we will create a bottom navigation bar (BottomNavigationBar) with two tabs to switch between the two subpages of the portfolio – Portfolio Tutorials and Portfolio Gallery
- We will add another option to switch between portfolio subpages using the PageView component
- We will implement BottomNavigationBar and PageView widgets in collaboration with Slivers
Procedure
First we open our existing application from the previous tutorial and we open the portfolio_page.dart file. This will be our starting file for this tutorial.
It is important to note that this tutorial is especially related to the previous one, where we created sliver widgets and learned how to work with them.
In the first half of this tutorial, we will more or less just prepare and modify the code and in the second half we will work on BottomNavigationBar and PageView widgets.
First we create 2 subpages of the portfolio.
In the pages folder, we will create a file portfolio_tutorials_sub_page.dart and in it the Stateless Widget – PortfolioTutorialsSubPage.
Next, we create a portfolio_gallery_sub_page.dart file in the pages folder and a Stateless Widget – PortfolioGallerySubPage in it. In the build method, we only return the text “Gallery” for now.
We go back to the portfolio_page.dart file and move the contents of the PortfolioPage class to the PortfolioTutorialsSubPage class. We import the missing libraries. And in the build method, we return CustomScrollView instead of the Scaffold widget.
PortfolioPage will change from Stateless Widget to Stateful Widget because we want to define certain variables and change their values in this class, and that’s basically not possible in the Stateless Widget.
In the build method, we return the Scaffold widget, where we add the PortfolioTutorialsSubPage widget to the body attribute.
We open the PortfolioTutorialsSubPage widget and in the build method we extract the SliverAppBar widget and define its title attribute and set it to “Tutorials”.
We can move this widget to an external portfolio_sliver_app_bar.dart file in the components folder. And then import it in the PortfolioTutorialsSubPage widget.
We extract the SliverFixedExtentList widget into the _buildSliverContent method.
Now we can copy the build method and paste it into the PortfolioGallerySubPage class. We import the PortfolioSliverAppBar widget and change its title to “Gallery”.
We create the _buildSliverContent method, which returns the SliverFillRemaining widget, where we define the text “Gallery” with the bold font weight and we set the font size to 20. Then we wrap it with the center widget.
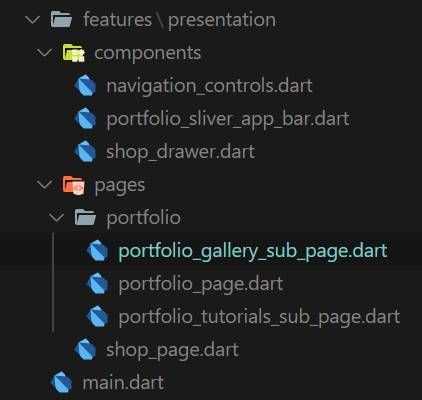
In the pages folder, we create a portfolio folder and move there our 3 portfolio classes to have a cleaner project structure. Since the PortfolioPage widget is triggered by clicking on an item in the drawer header, we need to edit the import in the shop_drawer.dart file.
We have 2 new subpages – PortfolioTutorialsSubPage and PortfolioGallerySubPage. And now we’ll learn how to define the BottomNavigationBar and PageView Widgets.
BottomNavigationBar
Let’s get started with the BottomNavigationBar widget.
We go to the portfolio_page.dart file and in the _PortfolioPageState class, we define the _pages list, in which we insert our 2 subpages. And also the variable _selectedPage, which represents an index of the selected subpage. First we set it to the initial value of 0.
In the Scaffold widget, for the body attribute, we add the _pages list here and set the index to the _selectedPage variable.
Subsequently, under the body attribute, we add another Scaffold attribute – bottomNavigationBar, into which we insert the BottomNavigationBar widget.
BottomNavigationBar has several attributes. We start with the items attribute, where we put a BottomNavigationBarItem two times and we set a particular icon and text.
And we set the selected index to our _selectedPage variable using the currentIndex attribute of the BottomNavigationBar.
It is important to note that the items in the _pages list must have the same order as items in the BottomNavigationBar for the items attribute.
In the BottomNavigationBar, all the desired effects and animations have already been implemented. But we still need to define a click listener for these tabs.
Therefore, we define an onTap attribute that has a tab click index as an argument. And we set this index to the _selectedPage variable. However, as we already know, in order to redraw the widget, we need to wrap it with the setState method.
And with this we have added the BottomNavigationBar widget to our app.
PageView
The next step is to add PageView. Therefore, in the Scaffold widget for the body attribute, we remove the current code and we insert the PageView widget there. The PageView has the attribute children, in which we insert the _pages list.
We have completed the sliding between our subpages, but switching the tabs in our bottom navigation bar is still not working.
Therefore, we add another PageView attribute – onPageChanged, which has an index of the currently viewed page and we set this index to our variable _selectedPage. And of course we’ll wrap it with the setState method.
As a result, the display of active tabs in the bottom navigation bar works correctly. However, we may notice that nothing happens after clicking on the individual BottomNavigationBar tabs. This is because we have linked a change of pages in PageView with BottomNavigationBar, but not vice versa. So we need to link a change of tabs with the PageView as well.
And for that we define a new variable _pageController.
And we add this variable to the PageView’s attribute – controller. PageController is used to manipulate pages in the PageView component. In our case we will use its method to change the pages in PageView and even use the animation option using the _pageController.animateToPage method.
In BottomNavigationBar, for the onTap attribute, we call the PageController method to change the PageView with a 300 millisecond animation and a linear animation effect.
NestedScrollView
In fact, the application is fully functional at this stage. However, each page has its own top bar (SliverAppBar). If we wanted to have a common top bar for both subpages and to define PageView only for the rest of the page content, we could use the NestedScrollView widget.
In the PortfolioGallerySubPage and PortfolioTutorialsSubPage classes, we remove the PortfolioSliverAppBar widget from the build method.
Then, in the portfolio_page.dart file, we wrap the PageView widget into the NestedScrollView widget, specifically we insert the PageView into the NestedScrollView attribute body.
Another attribute of the NestedScrollView widget is the headerSliverBuilder attribute, in which we create our PortfolioSliverAppBar widget.
But now we need to set a title of the SliverAppBar based on, which subpage is active. We’ll use Tuple2 for that. In our _pages list, we add a title to the subpage widget.
Then we can set a title for the PortfolioSliverAppBar according to the index of the current subpage. From the _pages list, we select the current item according to the _selectedPage index and then we return a variable item1 of the Tuple class, which represents a title of the particular subpage.
We still need to edit the children attribute in the PageView widget, where instead of _pages, we now need to return a specific widget from the _pages Tuple list.
To do this, we will use a map function, which we must define a return type to <Widget>. Then we will return the specific widget using the Tuple variable item2. Finally, we create a desirable widget list using the toList() method.
Conclusion
And with this is our seventh part of this first series of Flutter Tutorials completed and of course you can find the complete source code on the githube.